
A good template saves you a lot of erasing. Instead of drawing a gingerbread man by hand ten times, you print one, cut it out, and trace it onto whatever you have: felt, paper bags, cardstock or even cookie dough.
This free pack has six pages: a large gingerbread man, a page of four small gingerbread men, a gingerbread girl, a gingerbread house front, a full reindeer, and a reindeer head with big antlers. The outlines are thick and simple, so they are easy to trace and easy for kids to cut.
Below you will find how to print them at the right size, plus five easy crafts to make with them. Every craft uses supplies you can find at a dollar store.
Free printables in this post:
What's in the Free Template Pack
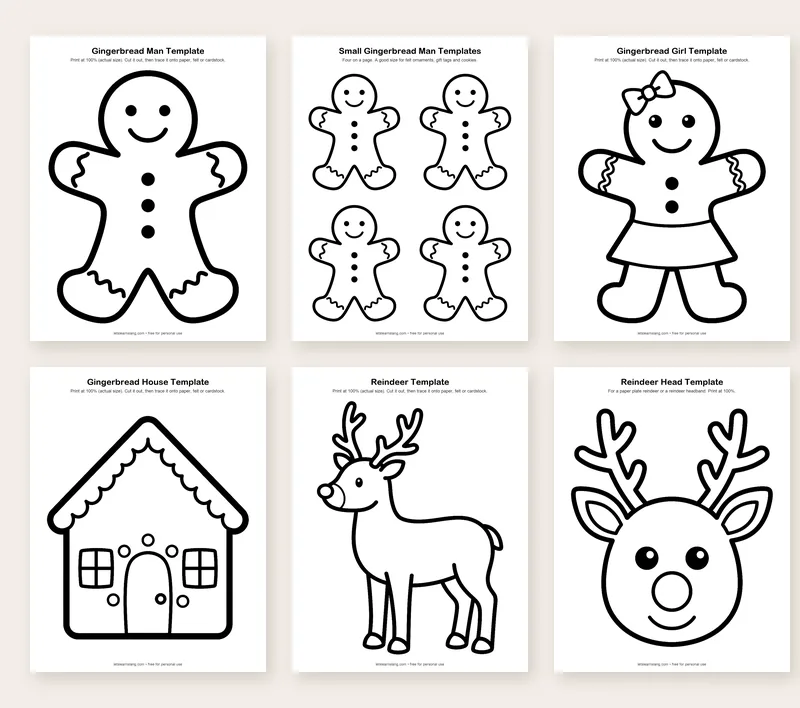
The PDF has six pages. Printed at 100%, the sizes are:
- Large gingerbread man, about 7 inches wide and 9 inches tall
- Four small gingerbread men on one page, about 3.3 by 4.2 inches each
- Gingerbread girl with a skirt and a bow, about 7 by 9 inches
- Gingerbread house front with a scalloped roof, door and windows, about 7 by 8 inches
- Reindeer, full body, standing, about 7 by 9 inches
- Reindeer head with antlers for headbands, puppets and paper plates, about 7 by 9 inches
How to Print and Use the Templates
- Print at 100%. In the print window, pick Actual size so the sizes above stay true. Fit to page can shrink them a little.
- Need a different size? Change the Scale setting. At 50%, the large gingerbread man is about 3.5 inches wide, which is a good size for ornaments. At 75%, it fits nicely on a card.
- Use cardstock for tracing. A cardstock template keeps its shape after you trace around it many times. For a stencil that lasts for years, glue the cut-out template onto the plain side of a cereal box and cut it out again.
- Trace on the back. When you trace onto felt or colored paper, trace on the back side. Pencil and marker lines will not show on the finished craft.
- Cut in two steps with kids. First cut a rough circle around the shape to get rid of the extra paper. Then go back and cut on the line. Small pieces are much easier for little hands to turn.
1. Felt Gingerbread Man Ornament
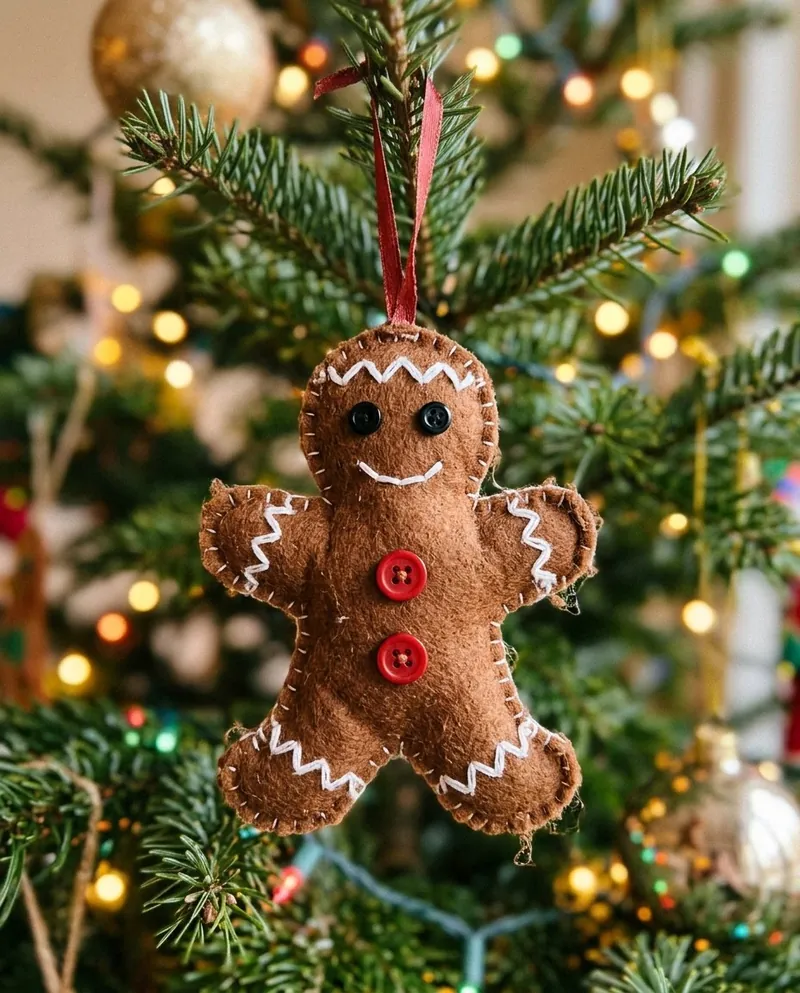
You need: brown felt, the small gingerbread man template, white embroidery floss or white puffy paint, 2 small black buttons, 2 red buttons, a handful of stuffing or cotton balls, and 8 inches of ribbon.
- Cut out one small gingerbread man from page 2.
- Hold it on two layers of felt and trace around it with a washable marker or chalk.
- Cut out both felt shapes.
- Sew the buttons onto the front piece. Add zigzag icing on the arms and legs with white thread, or draw it with white puffy paint and let it dry overnight.
- Stack the front and back. Fold the ribbon into a loop and tuck the ends between the layers at the top of the head.
- Sew around the edge with a simple running stitch. Stop about an inch before the end, push in a little stuffing, then finish sewing.
No-sew version: glue the edges with fabric glue and skip the stuffing. For toddlers, use felt circles instead of real buttons, since buttons are a choking risk.
2. Paper Bag Reindeer Puppet
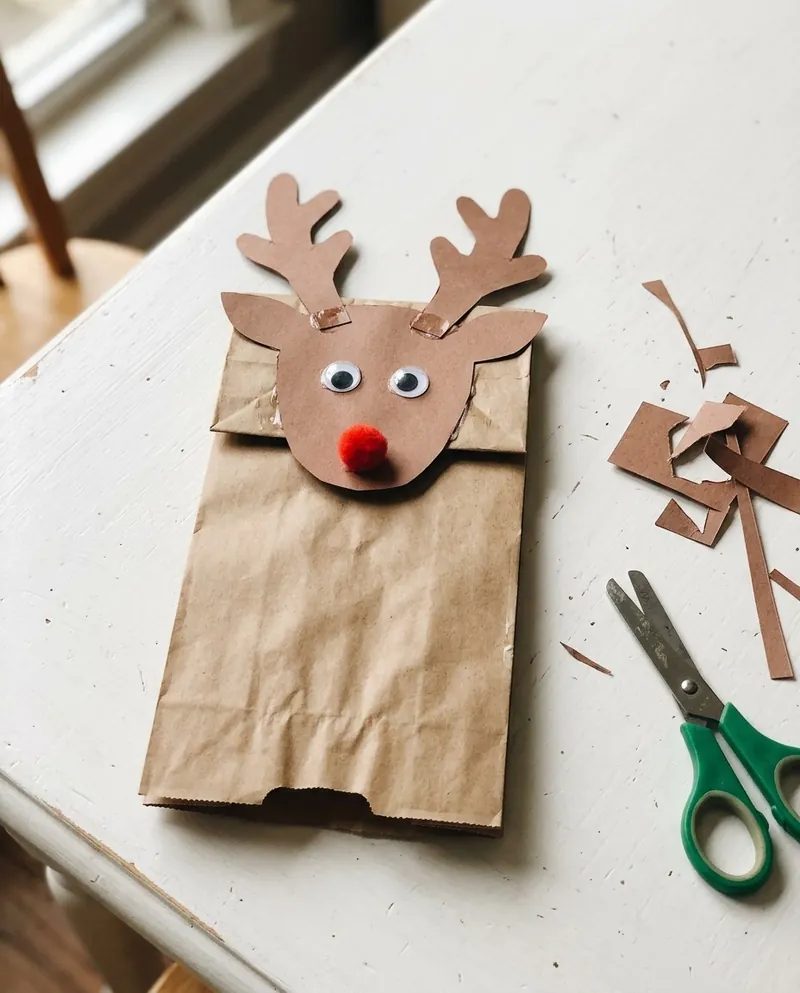
You need: a brown paper lunch bag, the reindeer head template, brown paper or cardstock, 2 googly eyes, a red pom pom, a glue stick and scissors.
- Print the reindeer head page at 60% scale. The head will be about 4.5 inches wide, which fits the bottom flap of a lunch bag.
- Cut out the head and antlers, trace them onto brown paper, and cut them out.
- Lay the bag flat with the folded bottom flap facing you. Glue the head onto the flap so the antlers stick up past the top.
- Glue on the eyes and the pom pom nose. Draw a smile under the flap so the reindeer talks when the flap moves.
- Let kids decorate the body of the bag with a scarf, buttons or a bow tie.
Want a gingerbread puppet instead? Use a small gingerbread man from page 2, cut off just the head, and glue it to the flap the same way.
3. Cookie Cutter Guide for Gingerbread Cookies
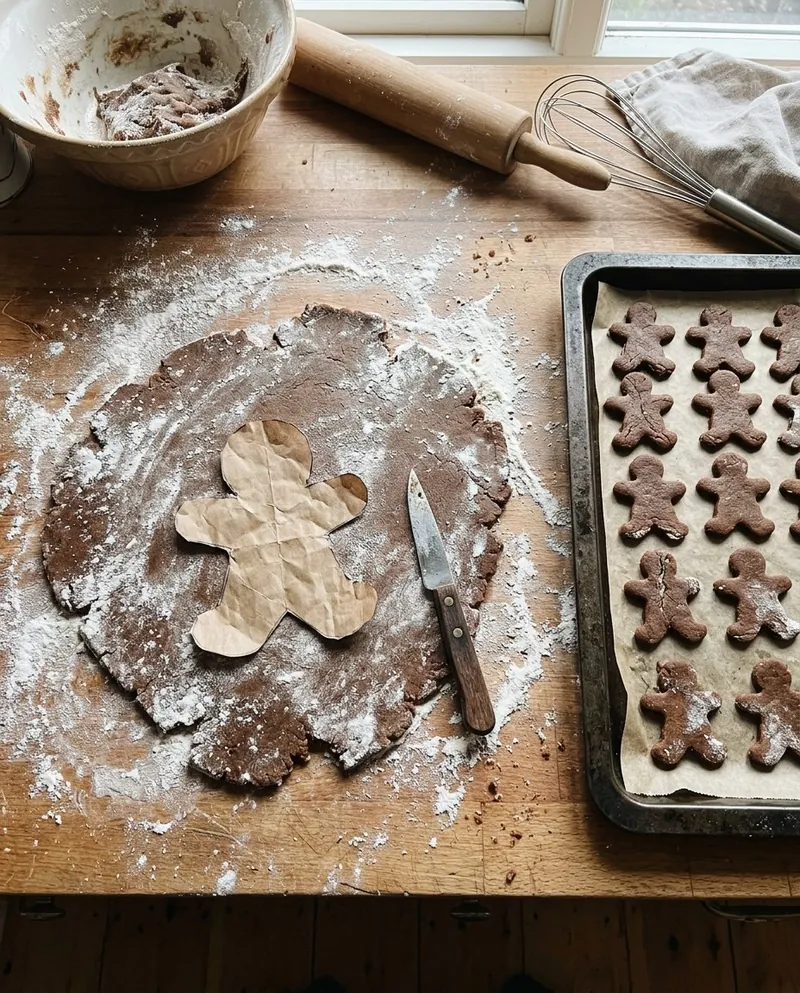
No cookie cutter in the shape you want? A paper guide and a small knife do the job.
- Cut out a small gingerbread man, the gingerbread girl printed at 50%, or the house printed at 50%.
- For a food-safe guide, trace the shape onto parchment paper and cut out the parchment. Use that on the dough, not the printed paper.
- Chill the dough for at least 30 minutes, then roll it about 1/4 inch thick on a floured counter.
- Dust the guide with a little flour, lay it on the dough, and cut around it with a small sharp knife. Lift the guide off and move the cookie with a thin spatula.
- Bake as your recipe says. Small gingerbread cookies usually take 8 to 10 minutes at 350°F. Let them cool all the way before you add icing.
Big cookies made from the house template make a fun Christmas card you can eat. Pipe the scallops, windows and door with white icing.
4. Gingerbread Front Door Decoration
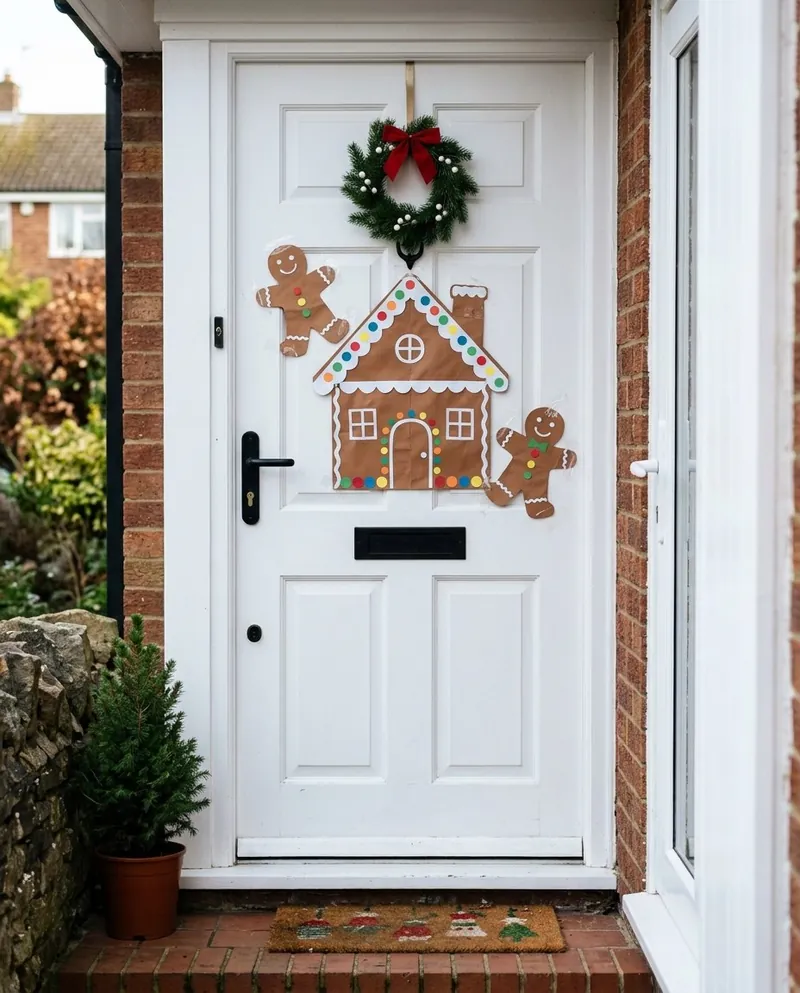
This one works on a front door, a bedroom door or a classroom door.
- Print the gingerbread house page and use it as a model. Draw a big version on brown kraft paper or brown poster board. A yardstick helps with the straight roof lines. Make it about as wide as the door.
- Cut it out. Add icing with white paper strips cut in wavy lines, or draw scallops with a white paint pen, just like on the template.
- Cut windows and a door from colored paper and glue them on. Add candy dots made from paper circles in bright colors.
- Print the large gingerbread man and girl on brown cardstock, cut them out, and add white icing and buttons. Place them on each side of the house.
- Hang everything with painter's tape so it comes off without peeling the paint. On an outside door, cover the paper with clear packing tape so damp air does not curl it.
5. Reindeer Headband
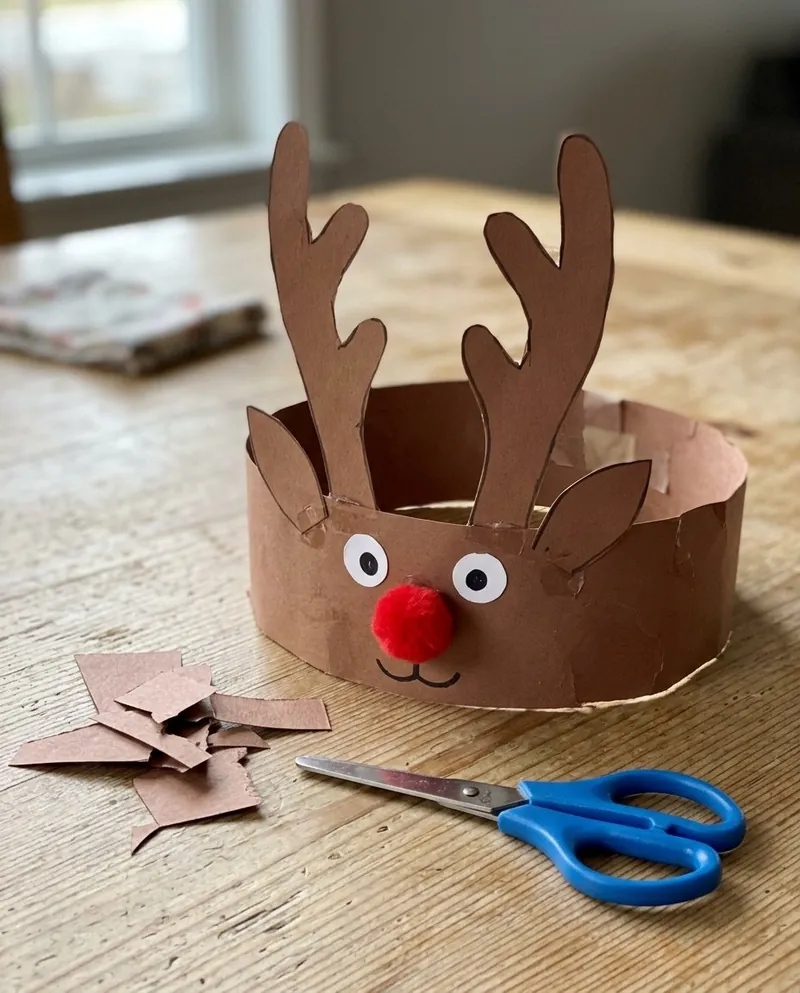
You need: brown construction paper or cardstock, the reindeer head template, a red pom pom, white and black paper scraps, glue, a stapler and scissors.
- Cut a strip of brown paper about 2 inches wide. Wrap it around your child's head and add an inch for overlap. Tape two strips together if one is too short.
- Print the reindeer head page at 100%. Cut out just the two antlers and the two ears, then trace them onto brown paper and cut them out.
- Glue the antlers and ears to the inside of the band so they stand up above it.
- On the front, glue two paper eyes and the pom pom nose. Draw a smile with a marker.
- Fit the band to your child's head and staple the ends. Point the flat side of the staples toward the inside, or cover them with tape, so they do not catch hair.
Paper plate version: paint or color a paper plate brown, glue the antlers and ears to the top edge, and add the eyes and nose. Hang it on the door or tape a craft stick to the back to make a mask.
When you finish, keep the cut-out templates in a zip bag with your Christmas decorations. Next year you can skip the printing and go straight to the fun part.